
I burned rice on the stovetop more times than I care to admit. Not because I am a bad cook. Because I am a busy one. I would get the pot started, walk down the hall to check on my mom, come back five minutes later, and find a scorched crust on the bottom and crunchy grains on top. Every single time. If you cook for one or two people and rice keeps letting you down, you are not doing it wrong. You are just using the wrong tool. The AROMA 3-Cup rice cooker (ASIN B00N9N6GOY) changed how I handle rice entirely, and the method below is what I use every week without thinking about it.
This guide covers white rice, brown rice, and a simple steam-and-cook trick for adding vegetables. All five steps take about three minutes of actual effort. The machine handles the rest, switches to keep-warm on its own, and shuts off safely. No timers, no hovering, no burnt bottoms.
Still watching the pot and hoping for the best? There is a simpler way.
The AROMA 3-Cup rice cooker is one of the most affordable appliances you can put on a small counter. It measures about the size of a large mug, cooks a full meal's worth of rice hands-free, and switches to keep-warm automatically. Rated 4.5 stars by more than 27,000 buyers.
Amazon Check Today's Price on Amazon →What You Need Before You Start
You need the rice cooker itself, dry rice, water, and about two minutes. That is it. The AROMA 3-Cup comes with a plastic measuring cup and a small rice paddle, so you do not need to buy anything else. The measuring cup is sized for rice cooker cups, which are a little smaller than a standard US cup measure. Use the cup that came with the machine and you will get the ratios right without any math.
One important note before step one: the inner pot is nonstick. Do not use metal utensils inside it. The plastic paddle it comes with is the right tool. If you lost it, a wooden or silicone spoon works fine.
Step 1: Measure Your Rice
Use the measuring cup that came with your AROMA cooker, not a regular kitchen measuring cup. One cooker cup of dry white rice makes about two standard servings when cooked, which is just right for one generous portion or two smaller ones. For two full servings with a little extra, use one and a half cooker cups. The 3-Cup model holds up to three cooker cups of dry rice, which is the right ceiling for this size machine.
Scoop the dry rice into the inner pot and set the pot on the counter. You will rinse it there in a moment. Do not put the pot back in the machine yet.
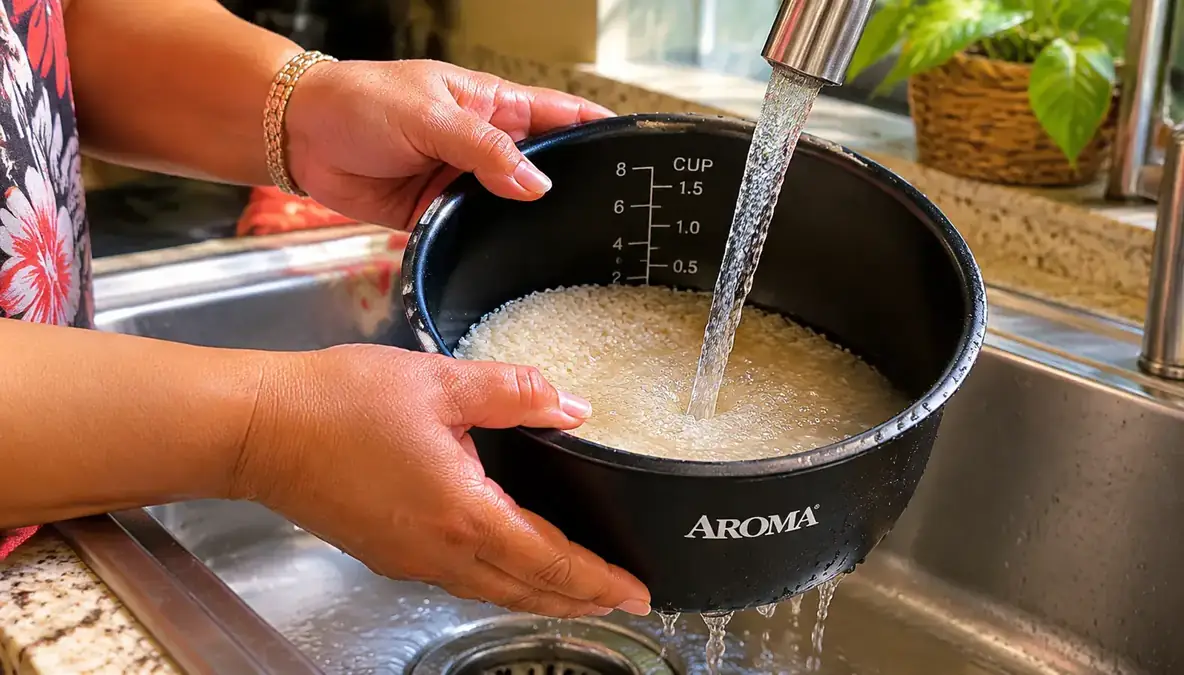
Step 2: Rinse the Rice Under Cold Water
Take the inner pot to the sink and add cold water. Swirl the rice gently with your hand or the paddle, then tip the pot to drain the cloudy water out while holding the rice back with your fingers or the paddle. Repeat this two or three times until the water runs mostly clear. This step removes excess starch, and it is the single biggest thing you can do for fluffy, separated grains instead of a sticky clump.
If your hands are sore or tired, you can put a mesh strainer over the sink, pour the rice in, and rinse it there before returning it to the inner pot. Either way works. The goal is just to get the starchy rinse water off before cooking.
Brown rice does not need rinsing quite as aggressively. One rinse is usually enough. The outer bran layer holds together well and the texture benefits more from soaking, which we will cover in a moment.
Step 3: Add Water Using the Right Ratio
This is the step that trips most people up on the stovetop. In a rice cooker, it is much more forgiving, but the ratio still matters. After rinsing, drain as much water as you can, then add fresh water for cooking.
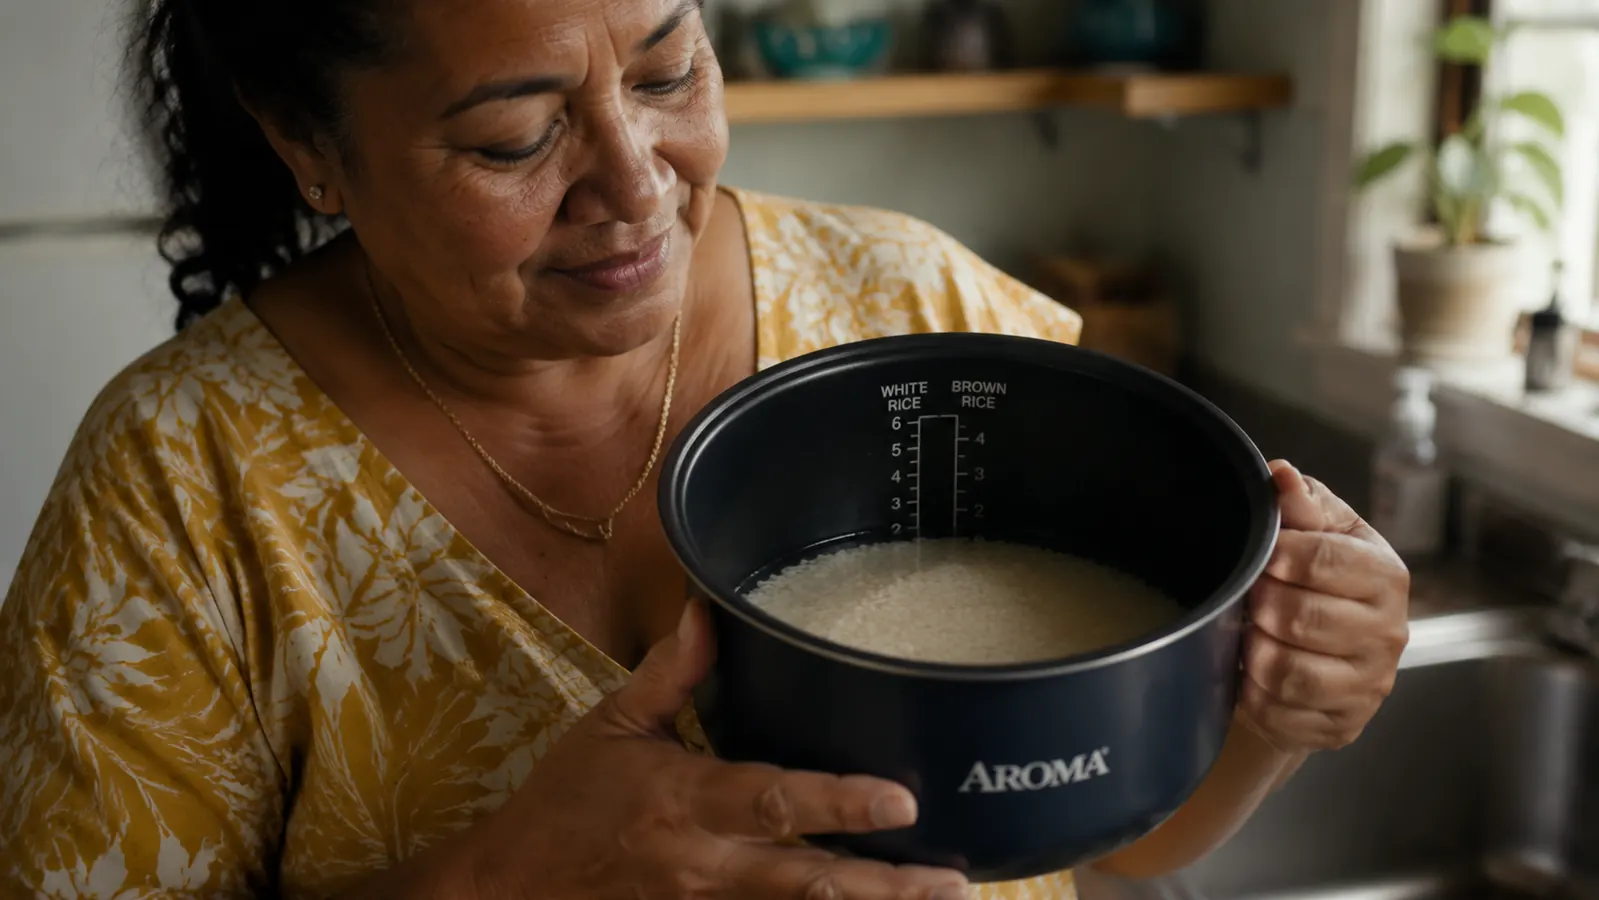
For white rice: fill water to the marked line inside the pot that matches the number of cups you measured. If you used one cooker cup of dry rice, fill to the line marked 1. If you used one and a half cups, fill between the 1 and 2 lines. The AROMA pot has these lines etched inside. They are the most reliable guide you have.
For brown rice: add a bit more water than the lines suggest. A good rule is to fill to one number above what you used in dry rice. So one cup of dry brown rice gets water filled to the 2 line. Brown rice has a tougher bran coat and needs more moisture and a longer cook time. If you are making brown rice and have an extra ten minutes, soaking the rinsed rice in water for 20 to 30 minutes before cooking gives you noticeably softer results. Not required, but worth doing when you are not rushed.
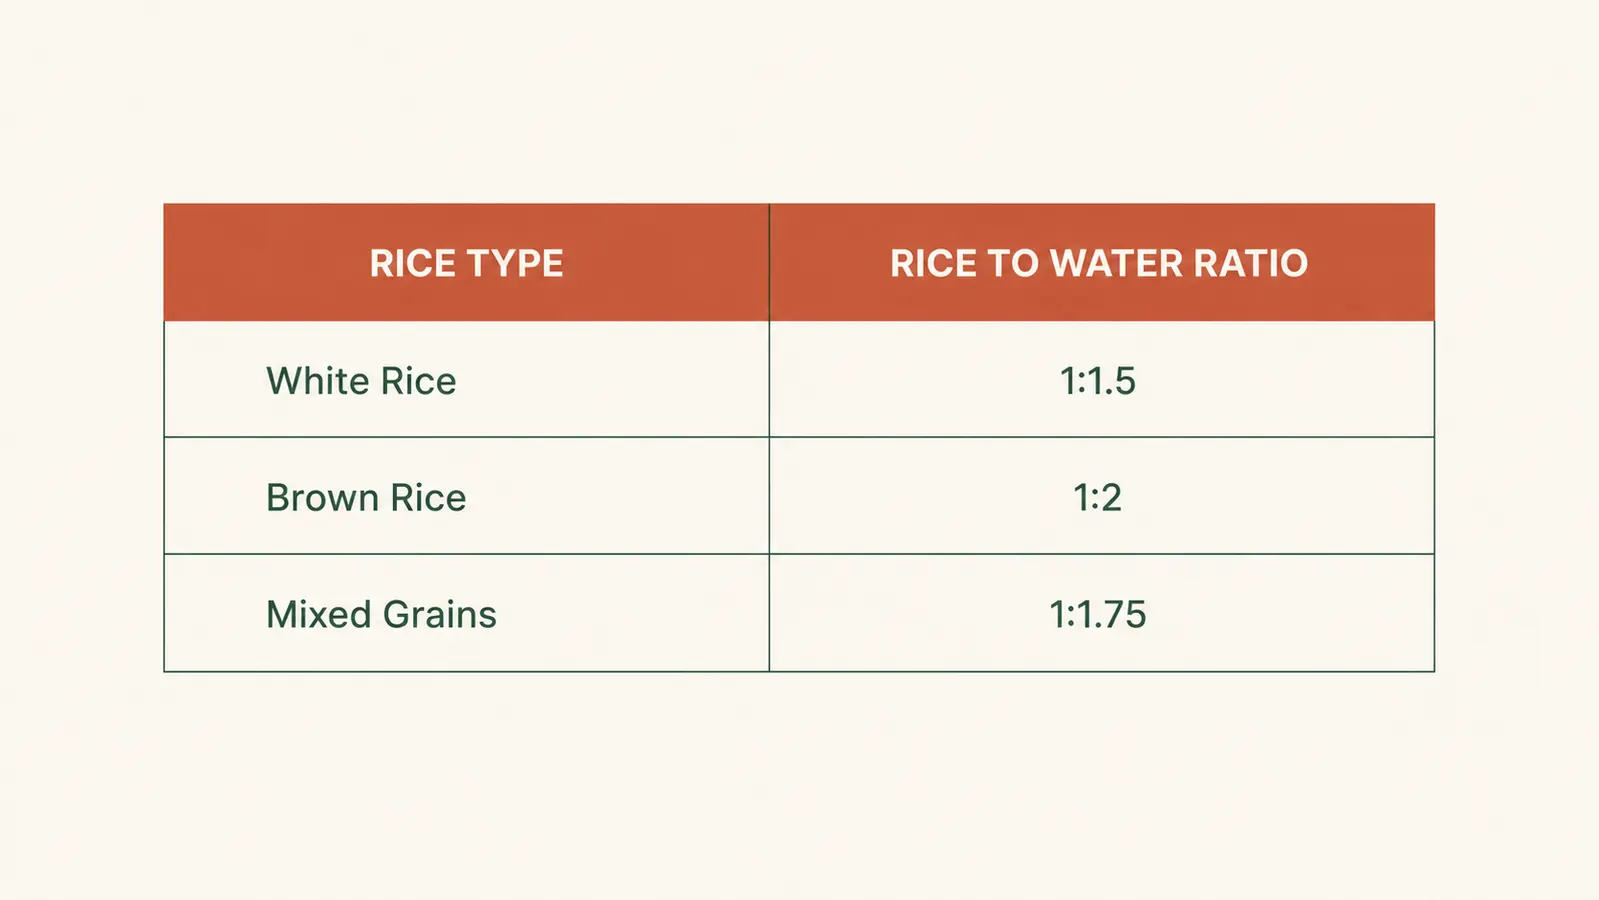
If you want a simple reference, here are the ratios that have worked consistently for me with this machine: white rice uses roughly 1 part dry rice to 1.5 parts water; brown rice uses about 1 part dry rice to 2 parts water. The pot lines make this easier than measuring by volume.
Step 4: Lock the Pot In and Press Cook
Set the filled inner pot back into the rice cooker. Make sure it sits flat and flush inside the body. Give it a gentle twist to seat it if it feels wobbly. Then close the lid. You will hear a soft click on some units, but even if you do not, as long as the lid is resting down flat, you are fine.
Press the Cook button down. It will stay depressed. That is the only button you press. The machine monitors the temperature and pressure as the water absorbs into the rice. When the water is fully absorbed, the cooker clicks up automatically and switches to the Keep Warm setting. You do not need to be in the room for this. You do not need a timer. You do not need to lift the lid to check. Leave it alone and let it work.
White rice in this machine takes roughly 25 to 30 minutes from cold start. Brown rice takes closer to 45 to 50 minutes. These times can vary a few minutes depending on how much rice you are making and how warm your kitchen is, but the machine switches on its own when it is done regardless of time. That is the part I love most. I can leave for a walk, or help my mom with her morning routine, and come back to warm rice that has been sitting safely on keep-warm the whole time.
I can leave for a walk and come back to warm rice that has been sitting safely on keep-warm. No scorched bottoms, no guessing, no babysitting.
Step 5: Rest, Fluff, and Serve
Once the cooker clicks to Keep Warm, let the rice rest with the lid closed for at least five minutes. This is not optional, even though it feels like one more waiting step. During those five minutes, the remaining steam inside redistributes through the rice and finishes the cooking gently. If you open the lid immediately after the switch clicks, the top layer will be steamy and wet while the bottom layer is dense. Five minutes makes a real difference.
After resting, open the lid and use the rice paddle to fluff from the bottom up with a folding motion. You are not stirring it in circles. You are lifting from underneath and letting air into the grains. Serve from the pot, or spoon into bowls. Keep the lid closed on whatever is left in the pot and it will stay warm for up to an hour without drying out.
How to Steam Vegetables at the Same Time
Some AROMA models come with a small steam tray that sits above the inner pot. If yours included one, this is where it earns its place. After you have added your rice and water in step three, place the steam tray in and load it with vegetables. Broccoli florets, sliced carrots, frozen peas, or diced zucchini all work well. Cut pieces small so they cook through in the same time window as the rice.
Press Cook as you normally would. The steam from the cooking rice rises up and gently cooks the vegetables while the rice finishes below. By the time the machine clicks to Keep Warm, you have rice and vegetables ready at the same time. One appliance, one cord, one thing to clean. For a simple dinner for two, this is as easy as cooking gets.
If your model did not include a steam tray, you can get one separately or simply cook rice on its own and steam vegetables in a covered saucepan with a small splash of water while the rice rests. Either approach works fine.
What Else Helps
A few small habits make this routine even smoother. First, always use the cooker cup that came with the machine rather than your kitchen measuring cups. The ratio markings inside the pot are calibrated for that specific cup size. Using a standard US measuring cup throws off the ratio and can leave you with wet or crunchy rice.
Second, do not lift the lid during cooking to check on things. I know it is tempting, especially the first few times. But each time you open it, steam escapes and the internal pressure drops, which throws off the timing and moisture. Trust the machine. It knows more about what is happening in there than you can see from the outside.
Third, clean the inner pot after every use while it is still slightly warm, not scorching hot. A soft sponge and a drop of dish soap is all it needs. The nonstick surface releases rice residue easily when it is warm. If you let it sit until fully cool and dry, leftover starch can stick. This is the only real maintenance the machine needs. The outer body just needs a damp wipe now and then.
If you want a deeper look at how this cooker holds up over months of regular use, my long-term Aroma rice cooker review covers how it has performed week after week in a small kitchen. And if you are deciding between this model and a pricier option, the Aroma vs. Zojirushi comparison breaks down exactly what the price difference gets you.
Common Rice Cooker Mistakes and How to Avoid Them
The most common issue I hear from people new to rice cookers is wet, mushy rice. Almost always this traces back to too much water. If your rice comes out sticky or gummy, reduce your water by a small amount next time. With the AROMA pot lines, filling just slightly below the marked line rather than right at it is often the fix.
The second most common issue is undercooked, slightly crunchy grains. This usually means not enough water, or the lid was opened during cooking. Try adding a small amount more water next batch, and keep the lid closed the entire cook cycle.
A slight film on the bottom of the inner pot after cooking is normal and not a defect. A little rice will always settle at the bottom and firm up slightly during the keep-warm phase if left too long. This is not burnt rice. It lifts right off with warm water and a soft sponge. If you are bothered by it, serve the rice sooner after the cook cycle ends rather than leaving it on keep-warm for an extended period.

Why This Method Works for a Small Household
When you cook for one or two people, you are not making a big pot of anything. You want just enough for a meal, maybe a little extra for tomorrow's lunch. The AROMA 3-Cup machine is sized exactly for that. It does not waste energy cooking a small amount in a large machine, and it does not take up half the counter the way a full-size rice cooker would.
The auto shut-off is the feature that matters most to me personally. I care for my mom, and I cannot always watch the kitchen. Knowing the cooker will switch off safely on its own, without me setting a timer or being in the room, means one less thing I have to track during a busy morning. That peace of mind is worth more to me than any fancy cooking mode.
At its current price, the AROMA 3-Cup is inexpensive enough that if it only saved you one ruined pot of rice and one burned pan to scrub, it would already be worth it. Most people who pick one up end up using it several times a week. It earns its counter space quickly.
Fluffy rice every time, no watching, no guessing, no burnt pot to scrub.
The AROMA 3-Cup rice cooker has a 4.5-star rating from more than 27,000 buyers and fits on the smallest counter. One button, automatic keep-warm, and easy nonstick cleanup. Check what it is selling for today.
Amazon Check Today's Price on Amazon →